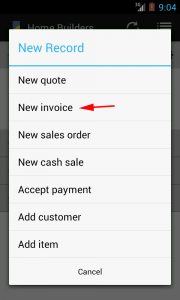
Create a new invoice for a customer
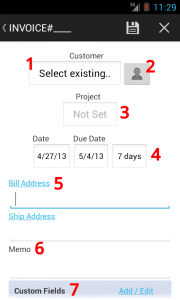
#1 and 2 – Set the customer for invoice
(1) click Select Existing to get a previously added customer
(2) click User icon to get a phone contact as the customer
#3 – after a customer is set, you can optionally select an existing project (or create new new one)
#4 – this is the terms of payment. Select from pre-defined range of days or manually set the Date/Due Dates
#5 – the Bill Address of the customer. This is automatically populated from the customer (or phone contact) record.
Optionally, you can let your Android device determine your current location and put that as the bill address. Just click on the Bill Address label.
#6 – Memo is any note you want to add to invoice
#7 – Custom Fields are a way to add other data that you cannot see or enter on this screen. You can skip this for now.
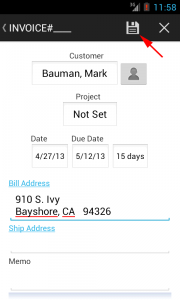
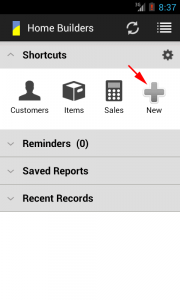
Fill up the invoice info, then save the invoice.
Add items to the invoice
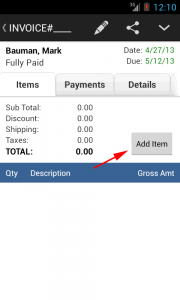
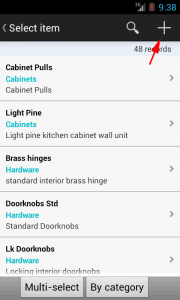
To create a new item, click (+)
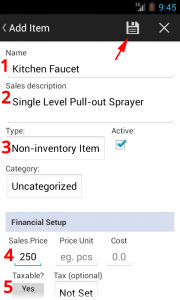
Some things to note on this screen:
1) Name = the item’s name (required)
2) Sales description = a short description of item (optional)
3) Type
– select Non-inventory if you don’t store (or stock) this item
– select Inventory if you wish to track the inventory or stocks
– select Service Item if this is a service you provide (like labor)
– select Shipping Item if you want to add a Shipping charge
– select Description Item to make an item appear as a simple label (useful to group lines on a transaction)
4) Sales Price = how much you are selling the item
5) Taxable = select Yes if a tax needs to be applied to this item when added to invoice. Only set Tax if you want a specific tax rate applied to this item whenever it is used on invoice.
Then click Save.
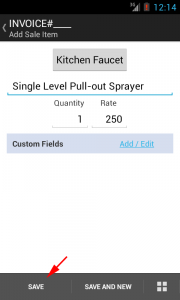
Item information is added to invoice. Click Save to finish.
Sync the Invoice to cloud
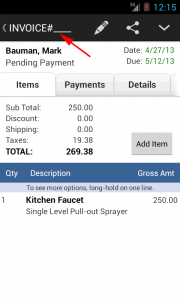
This is the new invoice with items on it. You can continue to add more items if you like.
This invoice is saved locally on your device.
INVOICE#____ means it has no transaction number yet. Number will be assigned after this invoice is synched (or sent to cloud).
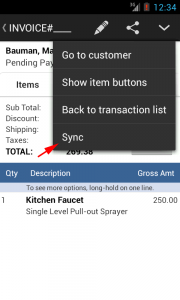
Click Sync to get a transaction number and send this invoice to cloud
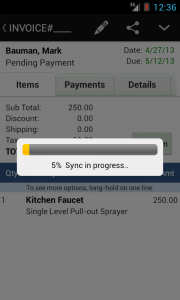
Wait until it finishes..
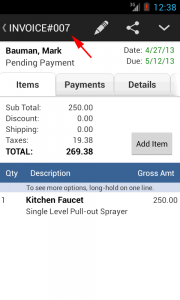
When sync is done, the invoice has a transaction number and was also sent to cloud (which means you are able to view this view on your other devices too).
If you wish, you can still continue to edit this invoice. Otherwise you can preview the invoice prior to sending to your customer.
