CreateAppointment_1
(1) Click on the APPOINTMENTS tab > Then click on the + sign
CreateAppointment_2
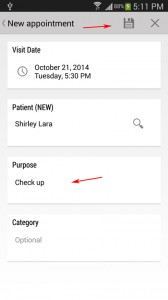
(2) Then click on the Visit Date to change the schedule of the appointment.
(3) Then click on the Patient section to choose or enter a patient.
CreateAppointment_3
(4) You can click on the Find button if the patient info already exist.
(5) Or Enter the First and Last name of the patient for new patient. > Then click on Done.
CreateAppointment_4
(6) Then click on the Purpose section to enter detail of the appointment.
(7) Then click on the Save icon.
CreateAppointment_5
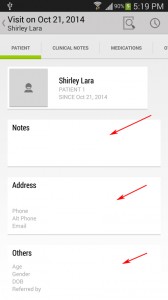
(8) Since the patient is a new user the other details will need to be populated.
(9) Click on Notes to enter additional details about the patient.
(10) Click on address to enter the address, email and phone details.
(11) Click on the Others section to entere DOB, Gender and Referred by fields
CreateAppointment_6
(12) On Notes, you can enter more information about the patient.
CreateAppointment_7
(13) On Address, you can enter the address, phone details and email of the patient.
CreateAppointment_8
(14) On the Others section, you can choose the gender, enter the date of birth and Referred by fields.
(15) Click on Done button when finish.
CreateAppointment_9
(16) This will populate the Notes, Address and other information about the patient.
(17) Then click on the Back arrow to go back to the Home page.
CreateAppointment_10
(18) This will display newly create appointment.