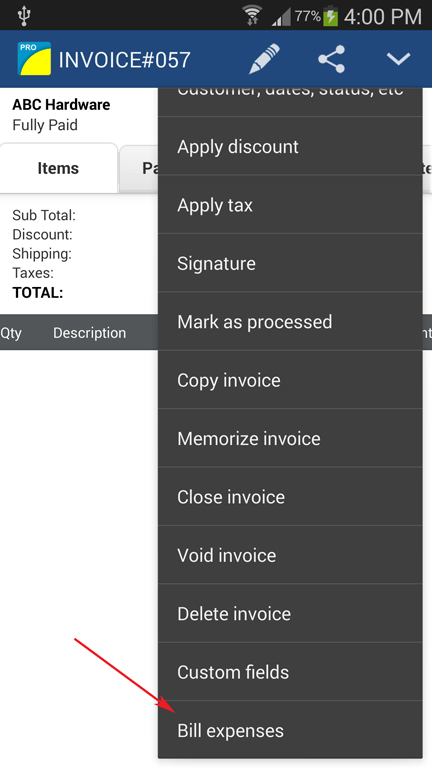
1) Open or create an Invoice.
2) Then click on the Pencil Icon > Bill expenses.
3) It will then show the list of expenses from the Expense @t Work App.
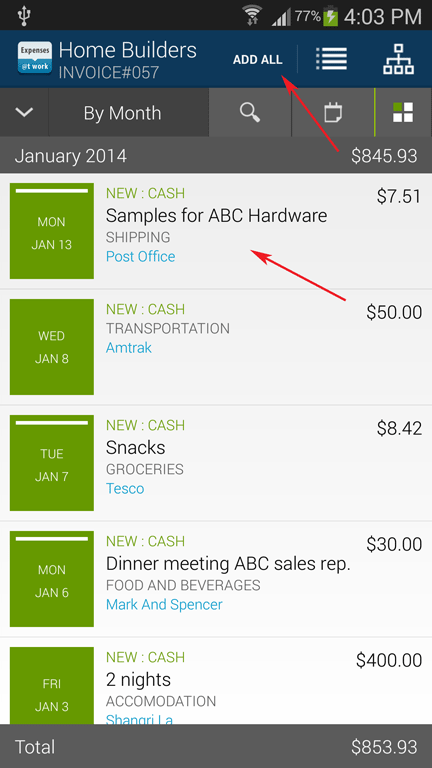
4) Choose the expenses that will want to add to your invoice.
5) Or click on ADD ALL button to add all the expenses listed.
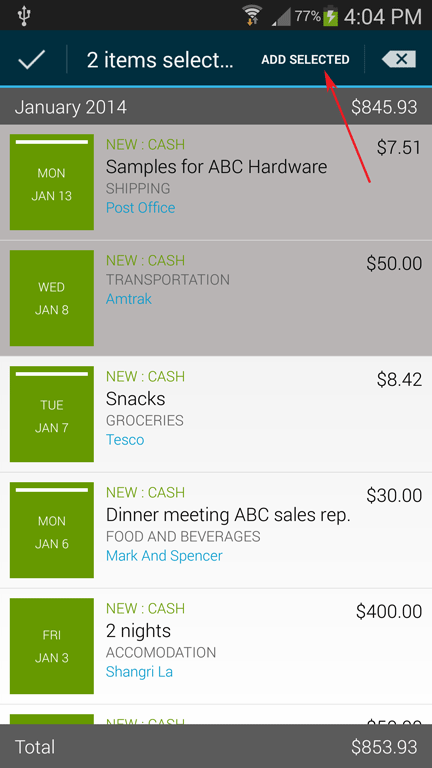
6) Then click on the Add SELECTED button.
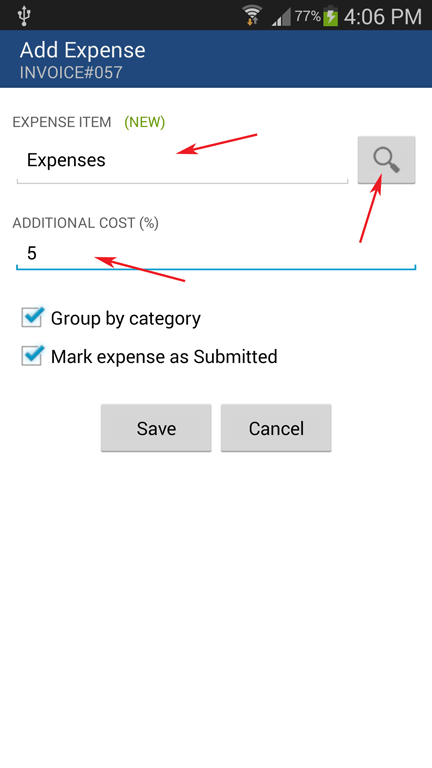
7) Then Enter or choose the Item Label for your invoice transaction lines.
8) Then click on Save button.
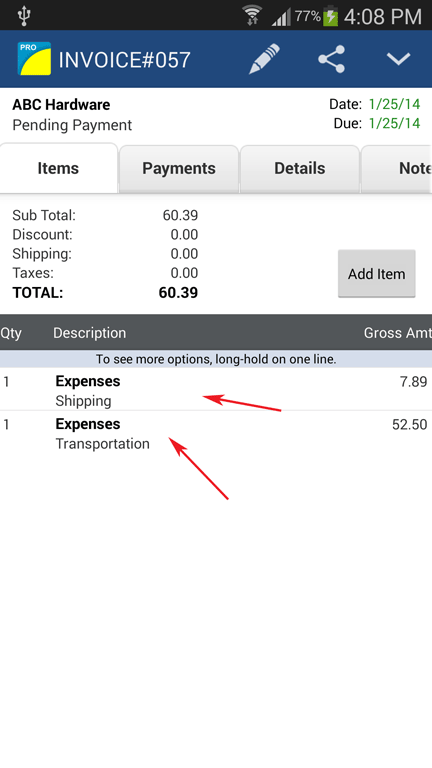
9) Expenses is now added to your invoice.
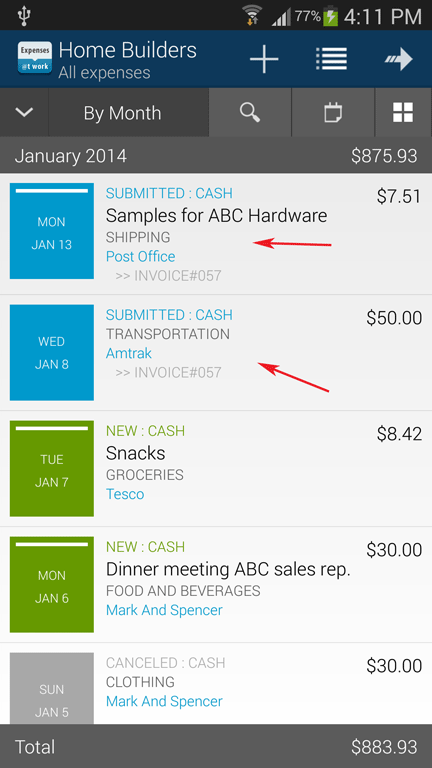
10) It will then update the status of your expenses to SUBMITTED.