To show the project on the pdf output :
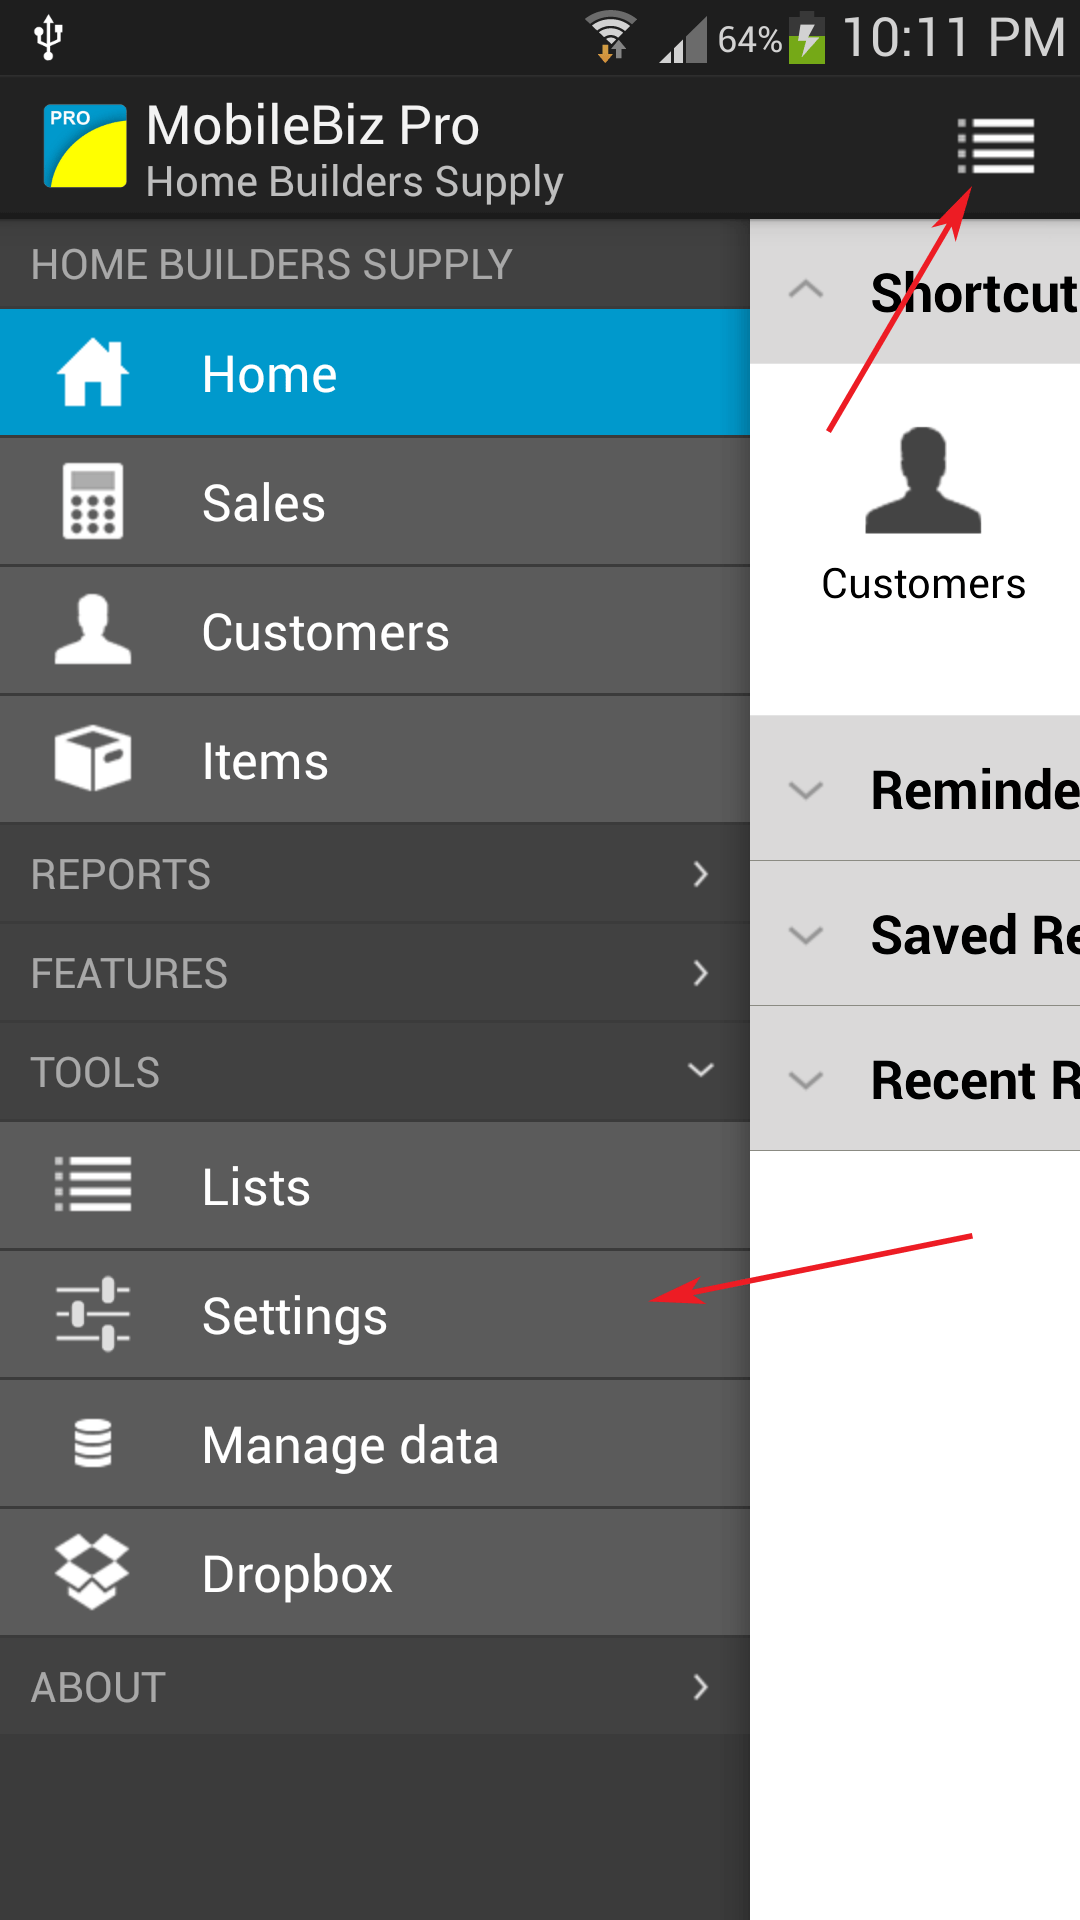
1) Go to Home > Menu > TOOLS > Settings
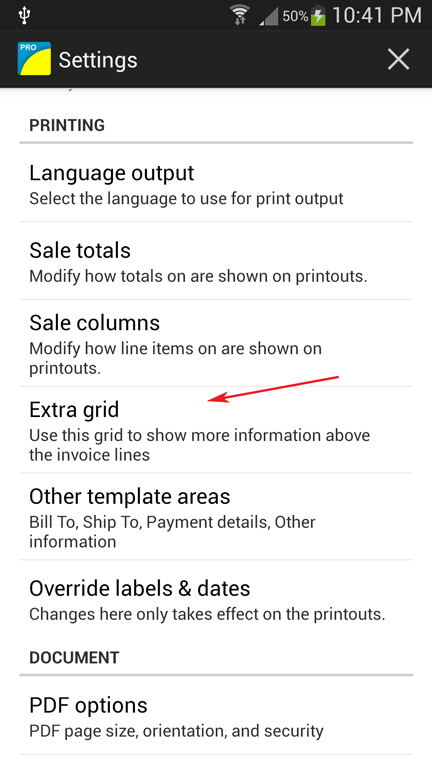
2) Choose Printing > Extra grid.
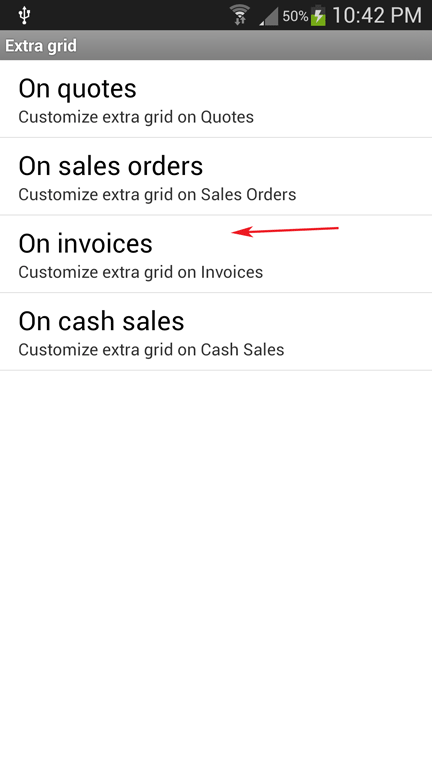
3) Then choose the transaction that you want to add the extra grid. In this case, we choose Invoice.
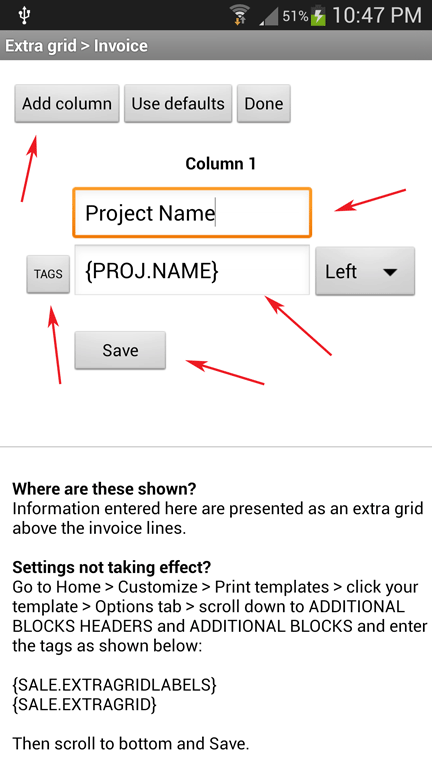
4) Click on “Add Column” button to enter the column details.
5) Enter the “TITLE” of the Column (ex. Project Name)
6) Then for the “VALUE”, click on “TAGS” and choose the tag name, in this case we choose {PROJ.NAME}.
7) Then click on Save button.

8) This will display the columns for the Extra grid.
9) Repeat step 4 – 7 to add more columns.
10) When finish, click on Done.
11) To check the output, go to any invoice and click on “Share Icon” > Print as PDF.
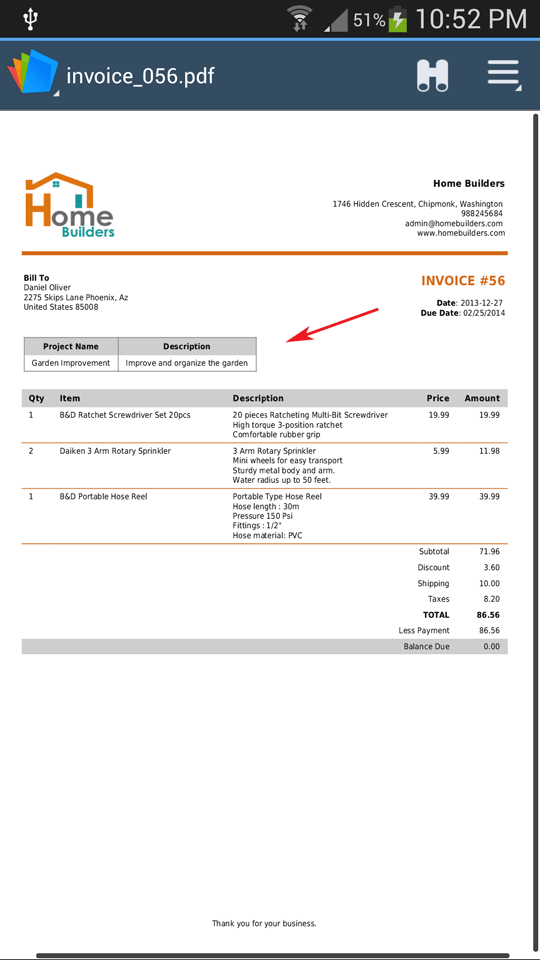
12) The Extra grid should display the project name and description.